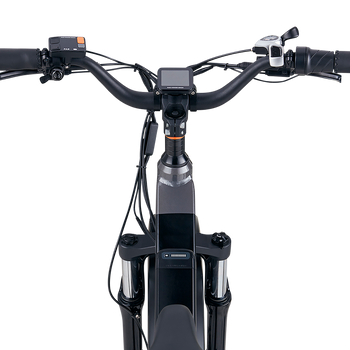
Learn about our products and best practices to help you keep your fleet riding Rad. Once you have reviewed all the below information, please sign the Compliance Agreement.
Under the commercial sales agreement entered between you and Rad Power Bikes, you must maintain the bikes, batteries, and related parts in accordance with Rad Power Bikes recommendation. This maintenance obligation includes completing the following training materials.
Unboxing & Assembly
Riding Basics
Regular Maintenance
Troubleshooting
Rad Power Bikes has developed a wide variety of troubleshooting guides to help you or your ebike mechanic perform service on your ebike, if needed. Click a link below to explore the various resource, or click through our Help Center to learn more about bike maintenance and repair.
Questions? Email us at
b2bsupport@radpowerbikes.com
Notice
If you do not have the experience, skill, and tools to complete assembly, adjustment, or maintenance of your bike, Rad Power Bikes highly recommends you consult with a local, certified, and reputable bike mechanic for any maintenance or repair needs.
Commercial Maintenance Schedule
After Assembly
Disclaimers
- Rad Power Bikes utilizes applicable safety and compliance standards when creating our recommendation for care and use below.
- Rad Power Bikes encourages all owners to ensure that fleet-use ebikes are maintained to uphold all applicable safety and compliance standards.
- Torque and mark all fasteners
-
Critical Safety Check
- Handlebar
- Twist - use the handlebar to twist the front wheel against your lower leg: the handlebar and stem should not move relative to the wheel
- Press - push downward on the handlebar as though trying to compress the front fork: the handlebar and stem should be secure
- Brakes
- Squeeze - the levers should not touch the handlebar grip, even when squeezed hard
- Front - squeeze the front brake until it is locked and push the handlebar forward: the rear wheel should lift (the front wheel should not roll forward)
- Rear - squeeze the rear brake until it is locked and push the handlebar forward: the rear wheel should skid (the rear wheel should not roll forward)
- Wheels and tires
- Wheel security - ensure the wheel is centered, fully seated in the fork dropouts, and secured properly with the quick release lever
- Quick release - ensure the quick release lever is closed completely (not against the front fork lower) and does not move or open easily
- Tire pressure - lean or press hard on the saddle: the tires should not deflect (bulge under pressure) more than 15%
- Saddle and seatpost
- Quick release - check that the quick release lever is properly secured
- Twist - use your palm and hit the nose of the saddle to one side several times, then to the other side: nothing should twist or rattle
- Folding hardware
- Latches - be sure all latches and secondary safety catches are engaged and nothing moves
- Battery
- Battery terminal contacts - ensure the plug contacts are clean and dry with no plastic deformation
- Battery mount terminal contacts - ensure the pin contacts are clean, dry, and straight
- Ensure the battery is locked to the frame, secure, and charged
- Cables
- Ensure all electrical and mechanical cables are secured out of the way of all moving parts
- Ensure cables at the front of the bike are properly routed, are not pulled taught, and do not impede steering
- Lights and reflectors
- Ensure the headlight, taillight, and (if applicable) brake lights are working properly
- Ensure all reflectors are installed and unobstructed
- Test ride
- Bed in brakes
- Handlebar
Before Every Ride
Critical Safety Check
Set tire pressure according to the Owner's Manual
Ensure fasteners are torqued to recommended values
Ensure quick-release levers at front wheel and seatpost are properly secured
Every 100 Miles
Check torque marks
Check braking and pad wear
Check shifting
Check battery terminals for dirt, signs of moisture or corrosion, etc. (in rough conditions)
Clean frame with damp cloth
Every 300 Miles
Basic Tune
Check tire wear
Replace worn parts
Every 750 Miles
Replace brake pads
Every 1,000 Miles
Rad Tune
Replace worn parts
When To Replace Your Battery
Warning
Using a damaged battery or charger can create additional bike damage or a fire hazard.
Stop using your battery and charger and contact Rad Power Bikes immediately if any of the below occur:
-
Your charger’s flexible power cord or output cable or any of the electrical cables on your bike is frayed, has broken insulation, or any other signs of damage.
-
Your battery or charger is physically damaged, non-functional, or performing abnormally.
-
Your battery or charger experienced a significant impact from a fall or crash, with or without obvious signs of damage.
-
Your charger becomes too hot to touch (it’s designed to get warm with normal use), makes a funny smell, or shows other signs of overheating.
-
Corrosion to the battery.
-
Check Battery Terminals
-
-
The battery has been submerged underwater.
Replace your battery in the event of:
- Significant loss of battery range.
Store any damaged battery or charger in a safe location and, as soon as possible, recycle or otherwise dispose of it according to local rules. Contact Rad Power Bikes if you have any questions or to purchase a compatible replacement battery or charger.
- Bikes need service based on miles ridden and riding conditions.
- Environmental conditions and how bikes are used impacts how and how quickly bike parts wear down.
- In clean, dry conditions and flat terrain, time between service intervals will be longer.
- In wet, dirty conditions and hilly terrain, time between service intervals will be much shorter.
- Under any conditions, parts of the bike will wear, requiring regular maintenance and eventual replacement.
- The more regular and complete the service each component receives, the longer its lifespan will be.
- Irregular or improper service can cause all sorts of spectacular and expensive failures, which are not covered by warranty.
- A well-maintained bike will work better for longer than you think, while a poorly-maintained bike will fail faster than you may have expected.
- A good maintenance program is the core of a successful bicycle fleet operation.
- A fleet operation requires professional service. If you need assistance locating a professional service partner:
Notice
The Commercial Maintenance Schedule should be actioned by a service professional.